
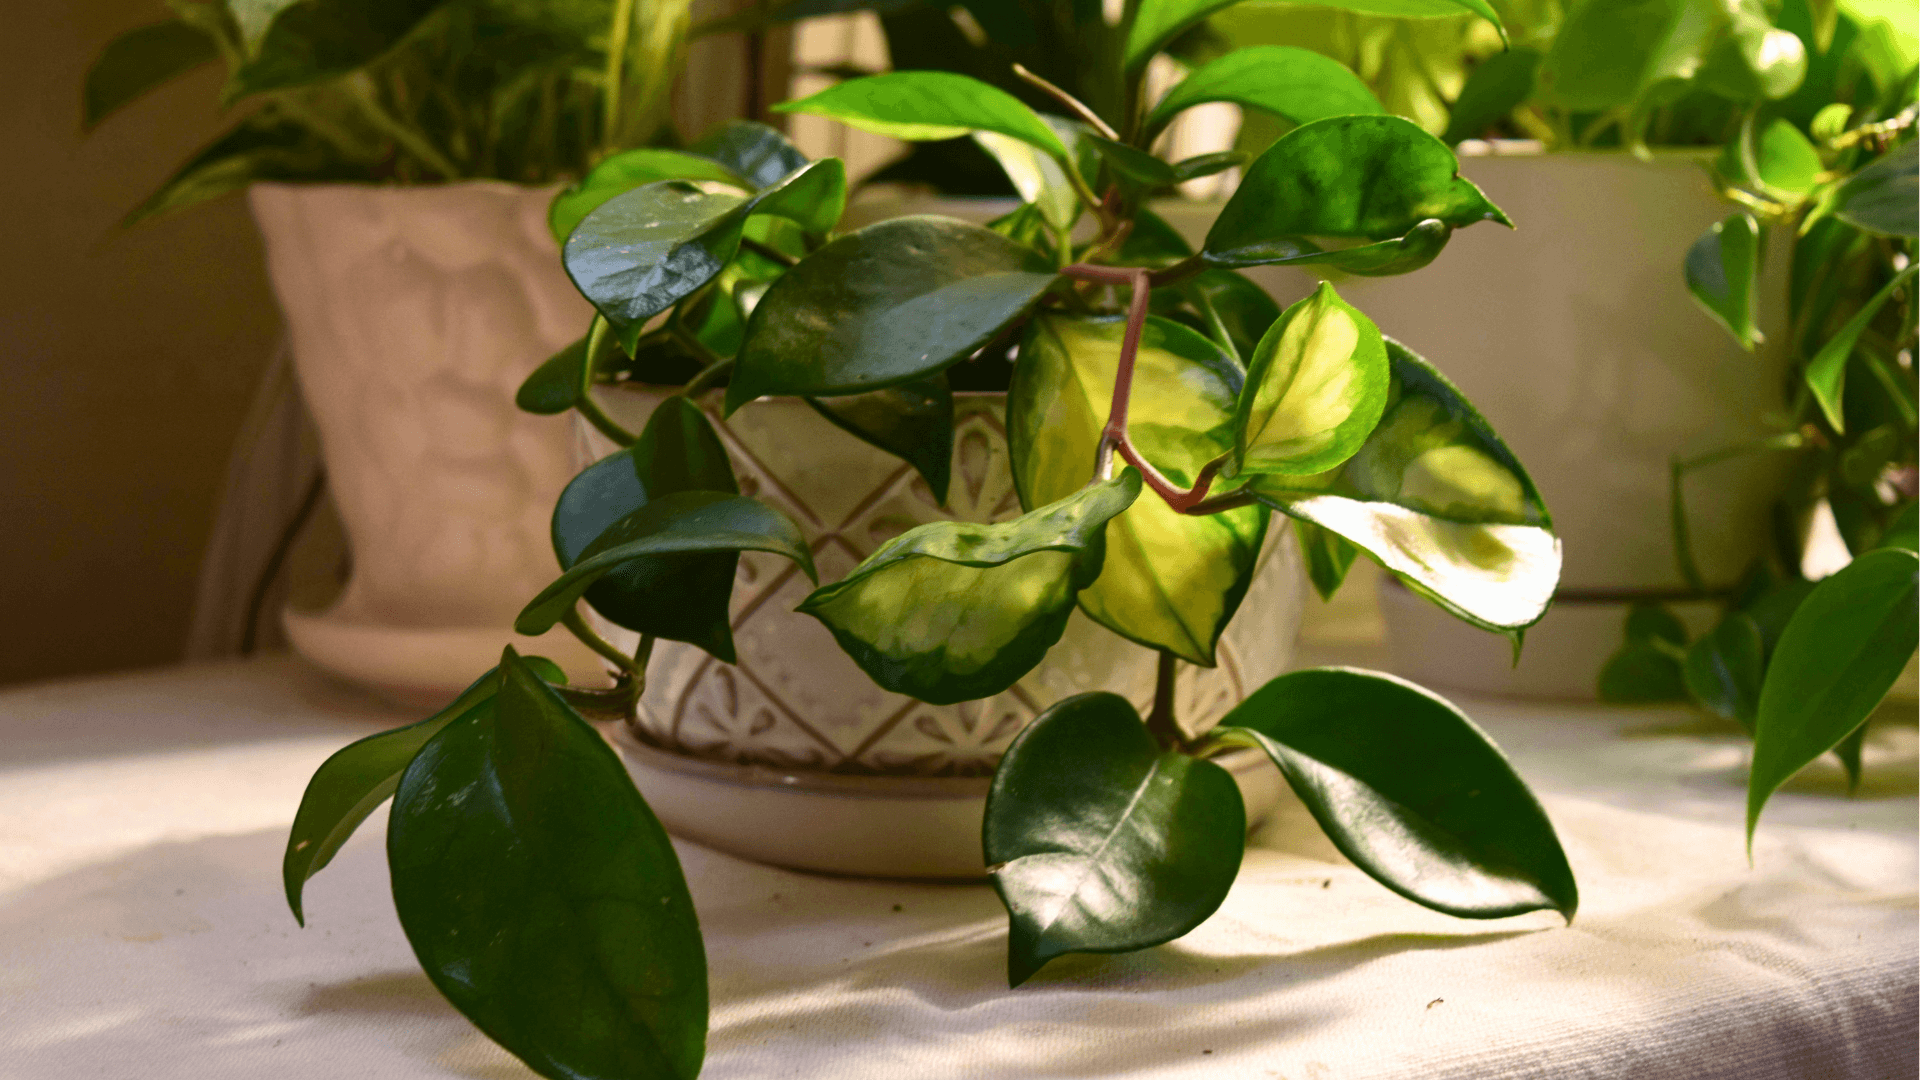
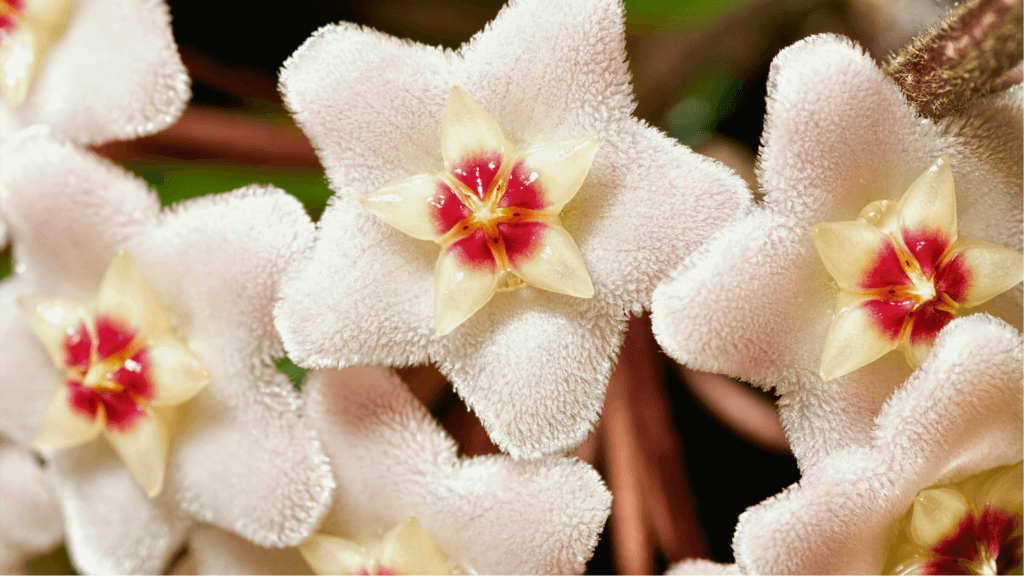
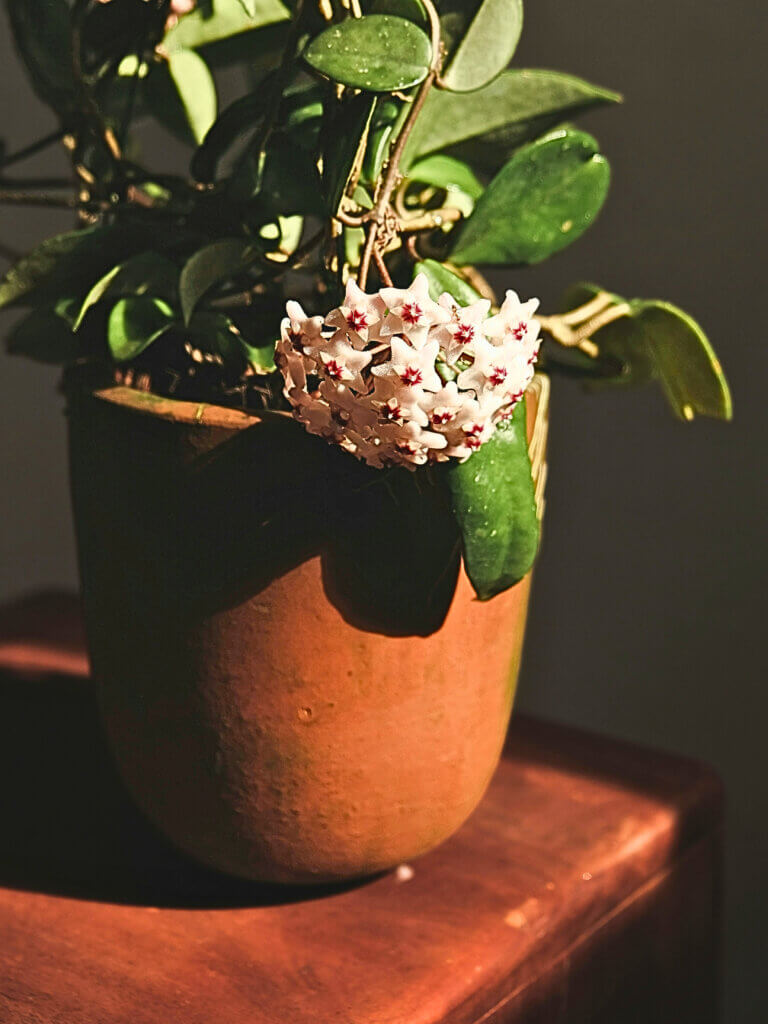
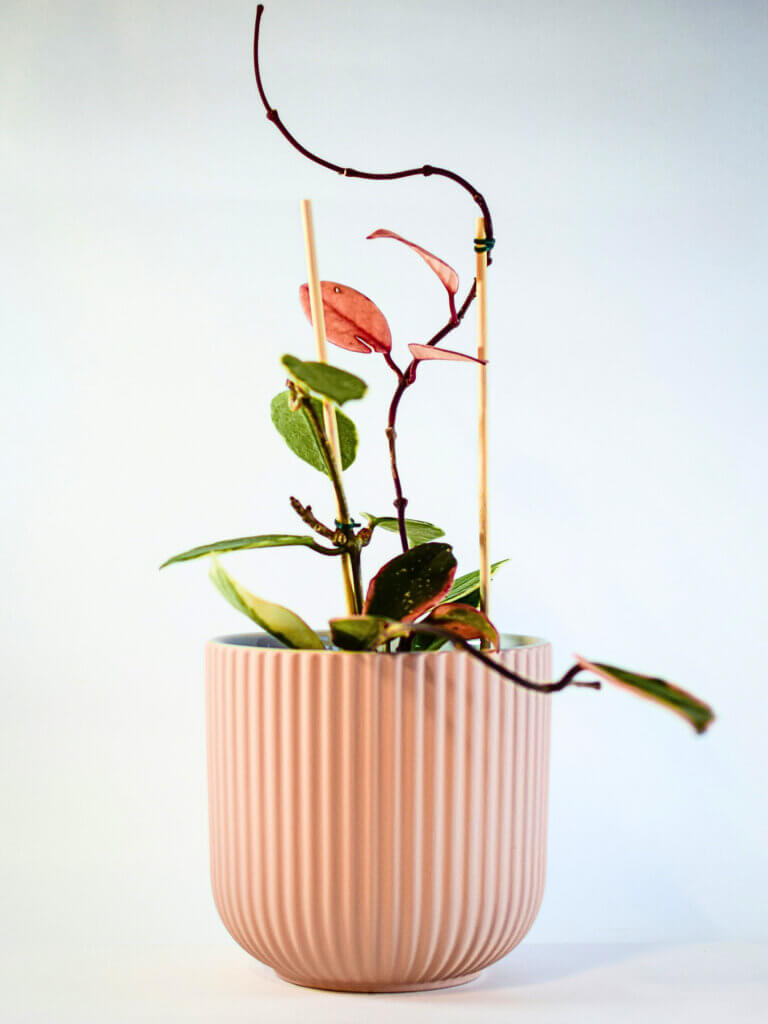
With their sculptural foliage and clusters of star-shaped, fragrant flowers, hoyas are understandably popular. They are sometimes called wax plants or porcelain flowers due to their waxy leaves and delicate flowers. Not only are they beautiful, but hoya care is also pleasingly straightforward.
Native to tropical and subtropical regions of Asia and Australia, hoyas naturally grow on trees or rocks. This means they’re accustomed to periods of drought, bright filtered light, and excellent drainage around their roots. Understanding this background is key to success, as it explains why hoyas prefer to dry out between waterings and thrive in well-draining compost rather than constantly moist conditions.
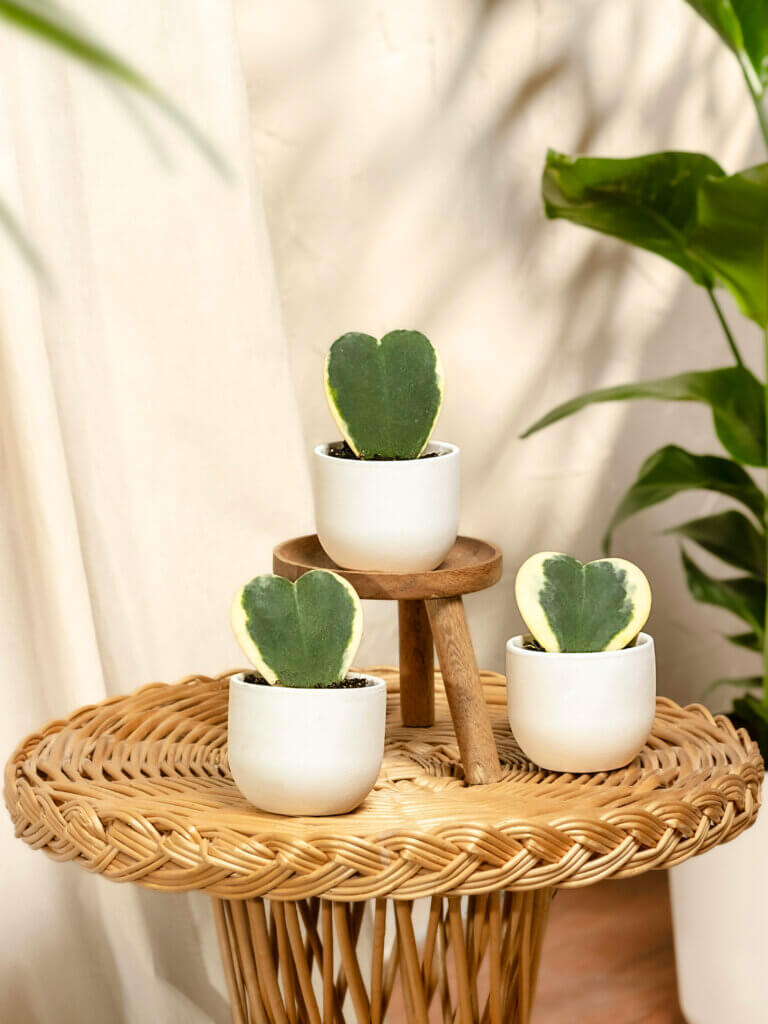
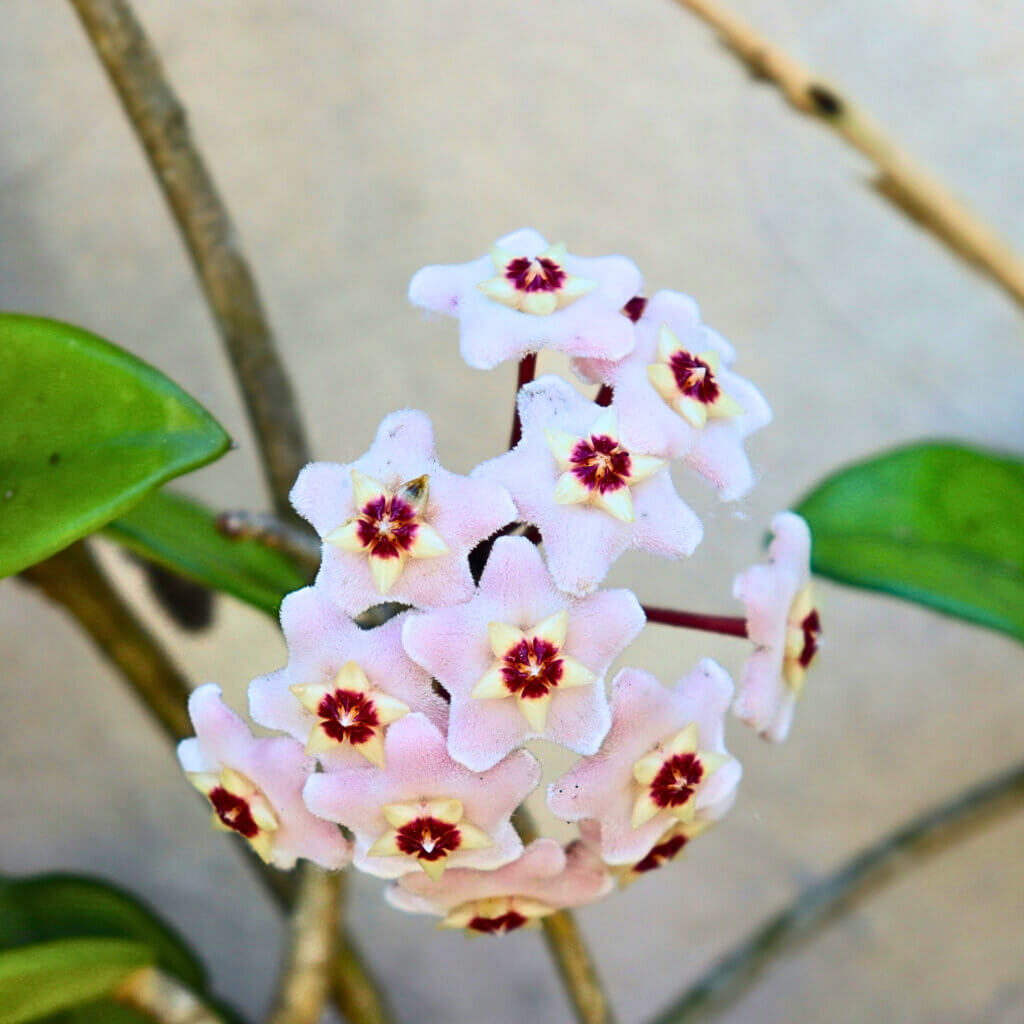
What makes hoyas particularly appealing is their diversity. With over 500 species and countless cultivated varieties, there’s a hoya for every taste and space. From the vigorous, easy-going Hoya carnosa with its thick, glossy leaves to the delicate, trailing Hoya linearis, and the charming Hoya kerrii with its heart-shaped leaves, the family offers extraordinary variety. Many produce clusters of waxy, five-pointed flowers in shades of pink, red, white, or yellow, often with an incredible fragrance that intensifies in the evening.
Read on to learn everything you need to know to keep your hoya healthy, encourage flowering, and troubleshoot any problems.
In this guide
Hoya care guide
| ☀️ Light | Bright but indirect |
| 💧 Water | Water infrequently and allow soil to dry. |
| ♨️ Humidity | Low to average |
| 🪴 Compost | Free-draining – potting compost mixed with Perlite. |
| 🌺 Flowering | Generally late Spring – Summer but may vary by species. |
Best location for your hoya
Hoyas are wonderfully adaptable plants, but getting the positioning right is important. In their natural habitat, hoyas grow as climbing or trailing plants in the forests of Asia and Australia, often scrambling up trees where they receive bright, filtered light. In the home, a spot with bright indirect light is ideal, somewhere close to a window but out of the path of harsh direct sun.
Signs your hoya is getting too much light
- Leaves are turning yellow or washed out.
- Brown, dry patches appearing on the leaf surface.
- Leaves feeling dry or papery despite regular watering
- The soil is drying out much faster than usual.
- Leaf edges are scorching or developing a reddish tinge.
Signs your hoya is getting too little light
- Growth has slowed or stopped, even during spring and summer.
- The plant is producing no flowers, or flower buds are forming but dropping before they open.
- Leaves are becoming darker and larger.
- Stems are growing long and leggy with large gaps between the leaves.
- The plant is visibly leaning or stretching towards the light.
How to display your hoya
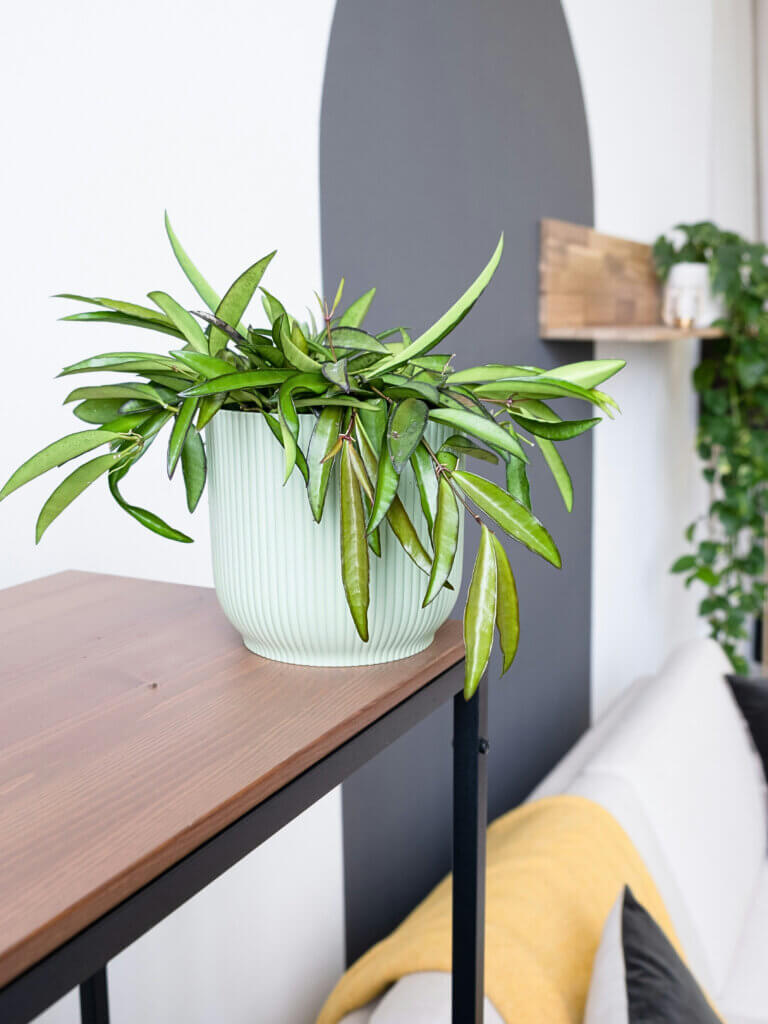
Hoyas are incredibly versatile when it comes to display, and half the fun is deciding how to show them off. Vining varieties like Hoya carnosa, Hoya pubicalyx, and Hoya linearis can be grown as trailing plants. These look amazing cascading from a shelf or hanging basket, or trained to climb up a moss pole, trellis, or wire hoop. More compact species such as Hoya kerrii and Hoya obovata work wonderfully on windowsills or shelves where space is limited, whilst miniature varieties like Hoya curtisii are perfect for terrariums or small decorative pots. Some hoyas, particularly those with striking foliage like the variegated Hoya carnosa ‘Krimson Queen’ or ‘Tricolor’, make beautiful standalone specimens regardless of how you display them.
How often to water your hoya
Hoyas are much more forgiving with watering than many tropical houseplants. In fact, they prefer to dry out between waterings rather than being kept constantly moist. This is because hoyas are semi-succulent plants, meaning their thick, waxy leaves are able to store water. The golden rule with hoyas is when in doubt, wait. Overwatering is by far the most common mistake people make with these plants, and soggy roots will cause far more damage than letting the compost dry out for an extra day or two.
A rough watering schedule should be:
- Spring/Summer: Every 7-10 days.
- Autumn: Every 10-14 days.
- Winter: Every 14-21 days.
When to increase watering:
- The plant is in active growth and putting out new leaves or flower buds.
- Temperatures have risen and the compost is drying out faster than usual.
- Leaves are looking less plump or firm than usual.
When to reduce watering:
- Growth has slowed or stopped as the plant heads into its autumn rest.
- The compost is still feeling damp when you come to water.
- Temperatures in your home have dropped and evaporation has slowed.
- Leaves are beginning to yellow at the base.
- The plant has recently been repotted into fresh compost, which will retain moisture more readily than older, broken down soil.
When to water most infrequently:
- During winter when the plant is at its least active.
- If the plant is in a cooler room where the compost takes much longer to dry out.
- When the plant is in lower light conditions than usual, reducing its need for water.
- If the plant has recently suffered root damage or rot and needs time to recover before taking on more water.
Top Tip
Hoyas are far more tolerant of being underwatered than overwatered, so if you’re ever unsure whether it’s time to water, give it another day or two. The thick, waxy leaves are a good indicator of the plant’s hydration levels. If they’re looking slightly shrivelled or feel less firm than usual, it’s time for a drink. If they look plump and healthy, hold off a little longer.
Best compost for a hoya
Getting the compost right for a hoya is really important. Hoyas are epiphytic plants in their natural habitat, meaning they often grow anchored to trees rather than in deep soil. This means their roots like lots of airflow, quick drainage, and a light growing medium. Hoyas can’t tolerate sitting in wet compost, and the wrong mix can quickly lead to root rot.
The good news is that you don’t need anything fancy, just something that drains freely and allows plenty of air to reach the roots. A standard peat-free multipurpose compost is a decent base, but it will need loosening up before it’s suitable for a hoya. Mixing in a generous amount of perlite is the simplest and most effective way to do this. A ratio of roughly two parts compost to one part perlite is usually sufficient.
In terms of pH, hoyas prefer a slightly acidic to neutral range, somewhere between 6.0 and 7.0, which most standard composts will fall within naturally. Refreshing the compost every couple of years is a good habit, as older compost breaks down and compacts over time, reducing drainage and increasing the risk of the roots sitting in moisture for too long.
Common hoya problems
Here are some of the common problems your hoya may encounter, and how to fix them.
Yellow leaves
Yellow leaves on your hoya can indicate several different issues, and identifying the cause requires looking at the pattern and location of yellowing.
- If one or two lower leaves are turning yellow and dropping, this is usually natural leaf turnover and nothing to worry about.
- If you have widespread yellowing across multiple leaves this is usually a sign of overwatering.
- Yellowing can also mean cold damage if the plant has been exposed to temperatures below 10°C.
To diagnose the cause, start by checking your watering habits and the growing medium. If the compost feels constantly soggy or the pot feels heavy, you’re likely overwatering. Allow the top few centimetres of compost to dry out completely before watering again, and ensure your pot has drainage holes.
Check the roots by gently removing the plant from its pot. Healthy hoya roots should be white or light tan and firm, whilst rotted roots appear brown, black, or mushy. If you find root rot, trim away affected roots with sterilised scissors and repot into fresh, well-draining compost.
If the yellowing started after a cold spell, move your hoya to a warmer spot (ideally 15-25°C) and it should recover with time. Consider feeding with a diluted liquid fertiliser during the growing season if you suspect nutrient deficiency, though hoyas are not heavy feeders.
Lack of growth
If your hoya appears healthy but simply isn’t producing any new leaves or stems, it’s likely in a dormant or semi-dormant state. Hoyas naturally slow or pause growth during winter months when light levels and temperatures drop. However, if your hoya shows no growth during spring and summer when it should be actively growing, the causes might be insufficient light, being excessively pot-bound, extreme underwatering, very low temperatures, or simply being a naturally slow-growing variety. Some hoya species, particularly those with thick, succulent leaves, grow remarkably slowly even in ideal conditions.
Ensure your hoya is receiving bright, indirect light. Insufficient light is the most common reason for lack of growth during the growing season. East or west-facing windows are ideal, or a spot a metre or two back from a south-facing window. Check that temperatures are suitable, ideally 18-25°C during the growing season.
If the plant has been in the same pot for many years, it might benefit from fresh compost and a slightly larger pot. Avoid going up more than one pot size as hoyas actually flower better when slightly pot-bound.
Begin feeding monthly with a diluted liquid fertiliser from spring through summer to provide nutrients for growth. Ensure you’re watering appropriately, allowing the top few centimetres of compost to dry between waterings. If all conditions are correct and it’s growing season, simply be patient. Some hoyas are naturally very slow growers.
Lack of flowers
Many hoya owners struggle to get their plants to bloom, despite healthy foliage growth. Hoyas can be slow to reach flowering maturity, with some varieties taking 3-5 years before producing their first blooms. However, if you have a mature plant that refuses to flower, the most common causes are insufficient light, removal of peduncles (the stalks from which flowers emerge), or lack of proper dormancy.
Make sure your hoya is positioned in bright, indirect light. During winter, reduce watering frequency and, if possible, move your hoya to a slightly cooler room (around 13-15°C at night) for 6-8 weeks. Feed with a high-phosphorus fertiliser (such as tomato feed) during the growing season to support bud development. Crucially, never remove the peduncles after flowers fade, as hoyas bloom repeatedly from the same spurs year after year.
Root rot
Root rot is one of the most serious problems hoyas face and is almost always caused by overwatering, poor drainage, or compost that has become old and compacted. Signs of root rot include:
- Roots turning brown or black, mushy or slimy.
- Roots producing an unpleasant, sour smell.
- Leaves looking shrivelled and dehydrated despite regular watering, as damaged roots can’t absorb water properly.
- Yellowing leaves, leaf drop, or wilting.
- Stems which feel soft at the base.
Immediate action is required to save a hoya with root rot. Carefully remove the plant from its pot and gently wash away all the old compost. Using sterilised scissors or pruning shears, cut away all brown, mushy, or hollow roots, cutting back to healthy, firm tissue. Be thorough, as any remaining rotted tissue will continue to spread.
If some healthy roots remain, repot the hoya in fresh, well-draining compost in a pot with plenty of drainage holes. Choose a pot that fits the remaining root system rather than giving it lots of extra room. Water very sparingly for the first few weeks whilst the plant recovers, allowing the compost to dry out significantly between waterings.
Sooty Mould on Leaves
Black, sooty patches on hoya leaves that rub off easily are sooty mould, a fungus that grows on the honeydew (sticky, sugary secretion) left behind by sap-sucking pests like aphids, mealybugs, scale insects, or whiteflies. The mould itself doesn’t directly harm the plant, but it blocks light from reaching the leaves, reducing photosynthesis. To prevent this you need to identify and treat the underlying infection (see below).
Corky or Rough Patches on Leaves
Raised, brown, corky, or rough-textured patches on hoya leaves, particularly on older foliage, are usually oedema. This occurs when the plant takes up water faster than it can transpire it through the leaves, causing cells to burst and form these distinctive rough patches. It’s most common when the compost is kept too wet, particularly in cool conditions with low light where transpiration rates are minimal. Overwatering, poor drainage, high humidity combined with poor air circulation, or watering cold plants can all trigger oedema.
Unfortunately, the corky patches are permanent damage and won’t disappear, though they’re primarily cosmetic rather than harmful. To prevent further oedema, improve your watering practices by ensuring the compost dries out more between waterings. Check that your pot has adequate drainage holes and the compost is well-draining. Avoid watering in the evening when transpiration rates are lowest. Improve air circulation around your hoya with a gentle fan if you’re growing in very humid conditions. Reduce watering frequency during winter when the plant is growing more slowly. New leaves should emerge without these patches once conditions are corrected. If you find the affected leaves unsightly, you can remove them, but this isn’t necessary for the plant’s health.
Brown, Crispy Leaf Tips and Edges
Brown, crispy edges or tips on hoya leaves typically indicate low humidity, underwatering, or a build-up of salts from tap water or excess fertiliser. Hoyas prefer moderate humidity and very dry conditions, particularly near radiators or in air-conditioned rooms, can cause leaf browning. Inconsistent watering, where the plant dries out completely and then is drenched, can also stress the leaves. Additionally, minerals and chlorine in tap water or accumulated fertiliser salts can burn leaf edges over time.
Increase humidity around your hoya by grouping it with other plants, using a pebble tray filled with water (ensuring the pot doesn’t sit in the water), or running a humidifier nearby. Reassess your watering schedule to ensure consistency. Hoyas prefer to dry out between waterings but shouldn’t be left bone dry for extended periods. When you do water, water thoroughly until it runs through the drainage holes.
If you suspect salt build-up, flush the compost thoroughly by running lukewarm water through it for several minutes, allowing it to drain completely. Consider using filtered or rainwater instead of tap water, especially if you have very hard water. Reduce fertiliser frequency or dilute it more than package instructions suggest, as hoyas are light feeders.
Leaf drop
Sudden or excessive leaf drop on hoyas usually indicates significant stress. The most common causes are dramatic changes in environment (such as moving the plant to a new location, sudden temperature changes, or cold draughts), root problems from overwatering or underwatering, or pest infestations. Some hoyas are particularly sensitive to being moved and may drop leaves in protest, even if their new location seems suitable.
First, check whether you’ve recently changed anything about the plant’s care or location. If you’ve just moved it, consider returning it to its original spot as hoyas often prefer stability over optimal conditions. Check soil moisture by feeling the compost. If it’s waterlogged, allow it to dry out significantly and reduce watering frequency going forward. If bone dry, water thoroughly and increase watering slightly. Examine the plant carefully for pests, checking leaf undersides and stem joints. Ensure the hoya isn’t exposed to cold draughts from windows or doors, or hot, dry air from radiators or heating vents. Maintain temperatures above 15°C and avoid dramatic fluctuations.
Once you’ve stabilised conditions, new growth should start to appear within a few weeks. It may take months for the plant to fully recover its appearance though.
Mealy bugs and aphids
These common sap feeders are drawn to hoya. Sap feeders are often identifiable by the presence of a sticky substance called honeydew which may accumulate on the top of leaves, but each pest has its own quirks as well.
Mealy Bugs
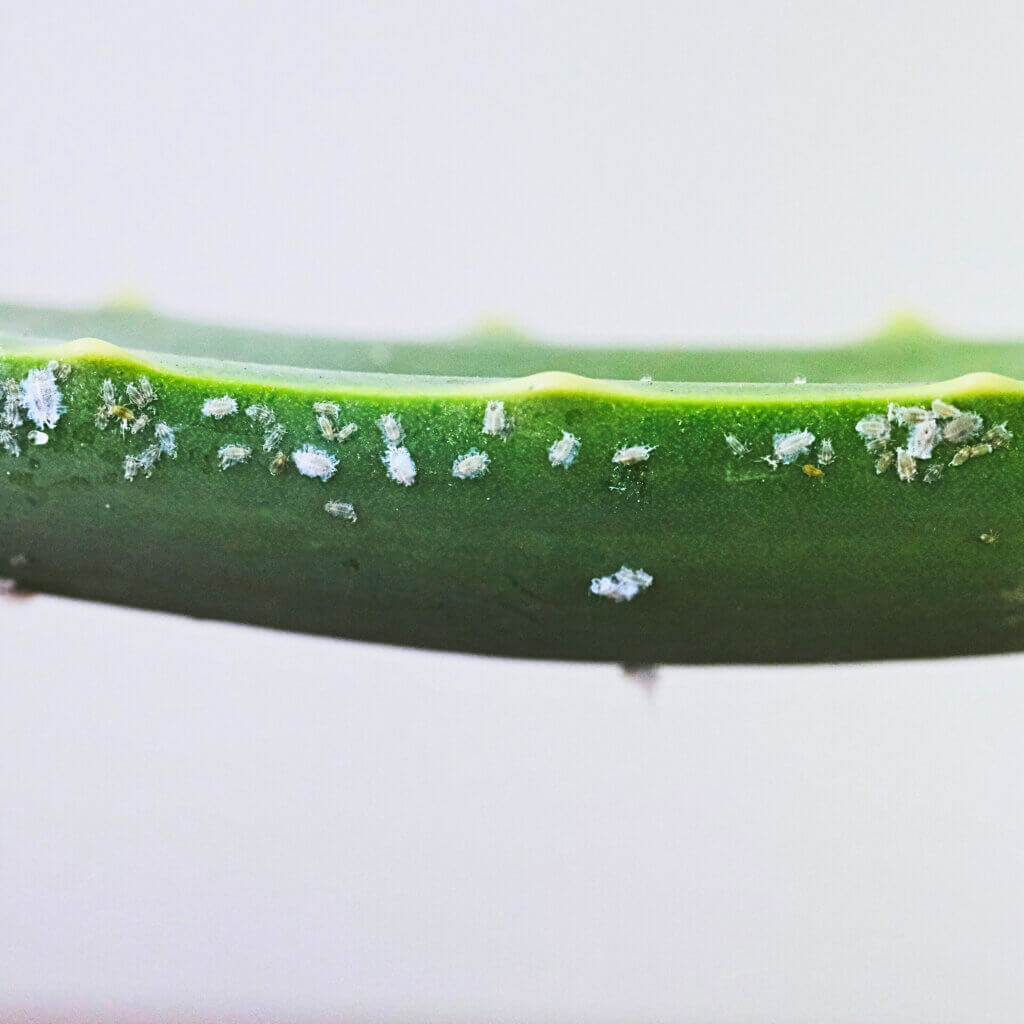
Mealy bugs often appear as a strange white fluff developing on your plant. These common household pest loves humidity so if you have them it might be good to move your plant somewhere drier.
Aphids
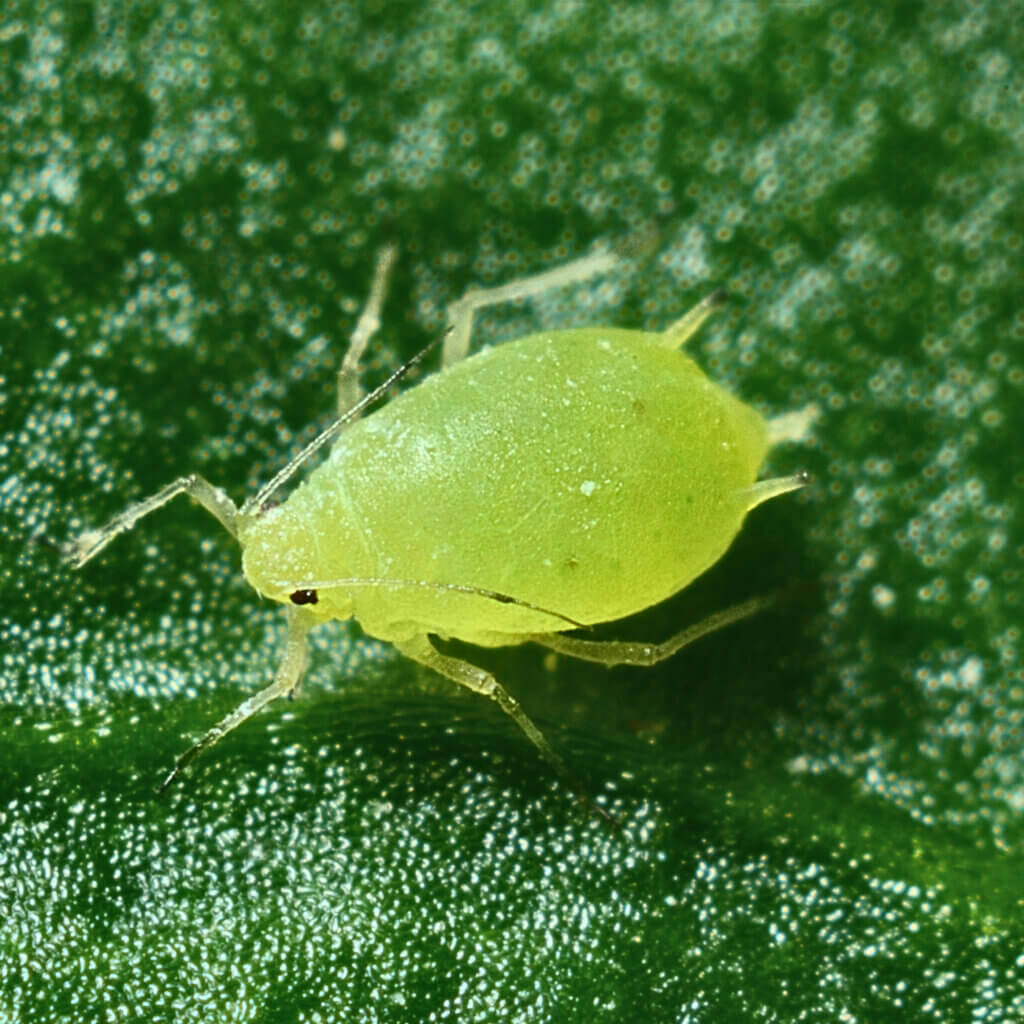
Aphids are usually pretty easy to spot, but you may be alerted to their presence by distorted and curling leaves, or by their white cast skins which can accumulate on leaves.
If dealt with promptly your plant should recover just fine. For a small population, manually removing them with a damp cloth is usually the easiest way.
They are usually already on plants when they are purchased, so be sure to check stems carefully when bringing a new plant into your home.
How to propagate your hoya
One of the many great things about hoyas is that they are genuinely easy to propagate, and stem cuttings are so reliable that even beginner growers tend to have good success. There are a couple of different methods worth knowing about, and both can produce excellent results. Spring and early summer are the best times to propagate, when the plant is in active growth and cuttings root most readily.
Stem cuttings in water
Water propagation is the most popular method for hoyas, partly because it works so well and partly because it’s satisfying to watch the roots develop over time.
- Select a healthy stem with at least two or three sets of leaves and use clean, sharp scissors or a knife to cut just below a node, which is the small bump on the stem where leaves and roots emerge from.
- Remove the lower leaves so that the bottom node or two are clear, as any leaves sitting in water will rot and can introduce bacteria to the cutting.
- Place the cutting in a glass or jar of water making sure the nodes are submerged but the leaves are sitting above the waterline. Position it somewhere warm with bright indirect light.
- Change the water every week or so to keep it fresh and prevent bacteria from building up around the developing roots.
- Wait for roots to develop which typically takes anywhere from two to six weeks depending on the variety and conditions. Aim for roots of around 3 to 5cm before potting up.
- Pot the rooted cutting into a small container filled with a well-draining hoya compost mix and water lightly. Keep it in a warm, bright spot and treat it gently for the first few weeks while it adjusts to growing in soil.
Stem cuttings in compost
Rooting cuttings directly into compost skips the transitional step of moving from water to soil, which some growers prefer as it can reduce the stress on young roots.
- Prepare your cutting in the same way as for water propagation, selecting a healthy stem and cutting just below a node with clean, sharp scissors.
- Allow the cutting to callous for an hour or two before planting, letting the cut end dry slightly to reduce the risk of rot.
- Fill a small pot with a well-draining compost mix and make a small hole in the centre with a pencil or your finger.
- Dip the cut end into rooting hormone powder or gel if you have it, as this can speed up the rooting process, though it is not strictly necessary with hoyas.
- Insert the cutting into the hole and gently firm the compost around it so it stands upright without support.
- Water lightly and place the pot somewhere warm with bright indirect light. Covering the cutting loosely with a clear plastic bag or a propagator lid can help retain humidity and encourage rooting.
- Check for roots after three to four weeks by gently tugging the cutting. If you feel resistance, roots have formed and the cutting is establishing well. At this point you can remove any cover and begin caring for it as you would a mature plant.
Layering
Layering is an excellent propagation method for hoyas with long, trailing stems. In this method the cutting remains attached to the parent plant whilst developing roots, ensuring it receives nutrients and water throughout the process. This often produces faster, more robust rooting than taking cuttings, though it requires a bit more space and setup.
Choose a healthy, flexible stem that can be bent down to reach a pot of compost placed beside the parent plant. Identify a node that will touch the compost when the stem is positioned. Optionally you can make a small, shallow wound on the underside of the stem with a clean blade. This isn’t essential but it can encourage rooting. Pin the node down onto the surface of moist, well-draining compost using something like a bent piece of wire. The node should be in firm contact with the compost. Keep the compost lightly moist and wait for roots to develop, which typically takes 4-8 weeks.
You’ll know roots have formed when you see new growth emerging from the layered section. Once well-rooted, use sterilised scissors to cut the stem between the parent plant and the newly rooted section. The new plant can remain in its pot or be transplanted if needed. Layering is particularly useful for rare or expensive hoya varieties where you don’t want to risk losing a cutting, as the process is very reliable.
Top Tip
When taking cuttings, always make sure you are cutting from a regular stem rather than from a flowering spur or peduncle. Hoyas reuse these structures to flower year after year, so removing them not only wastes a future flowering opportunity but also won’t produce a viable cutting anyway.
Hoya care FAQs
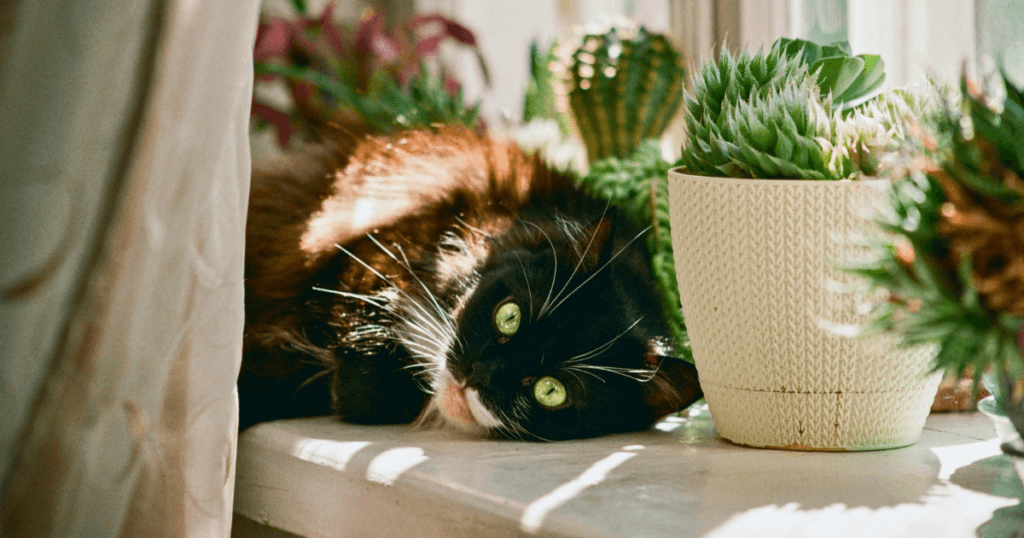
Q: Are hoyas safe for pets?
A: Yes, according to the ASPCA hoyas are considered non-toxic to cats, dogs, and other household pets. Some pets may experience mild stomach upset if they chew on the leaves simply because they are unfamiliar to their system. The thick, waxy leaves aren’t particularly palatable to most pets though so this isn’t usually a problem.
Looking for more pet safe plants?
Check out the complete guide to pet safe plants. Get advice on how to choose the right plants for your space and schedule, as well as creative ideas for how to style them.
Q: How long can hoya live?
A: Hoyas are long-lived plants that can thrive for decades with proper care. It’s not uncommon for well-maintained hoyas to live 20-30 years or more. Hoyas often become more impressive with age, developing thick, woody stems and producing abundant flowers. They often become easier to care for as well, developing more resilient root systems and adapting to their environment.
Q: How big can hoya grow?
A: The size of hoyas varies dramatically depending on the species, with the family containing everything from compact miniatures to vigorous climbers. Most commonly grown hoyas, such as Hoya carnosa and Hoya pubicalyx, are vining plants that can grow several metres long if left unpruned. Other popular species like Hoya kerrii (sweetheart hoya) and Hoya obovata tend to be more restrained, typically reaching 1-2 metres. Miniature varieties such as Hoya curtisii stay considerably smaller, with stems rarely exceeding 30-50cm. Hoyas grow relatively slowly compared to many houseplants, typically producing 30-60cm of new growth per year under good conditions, so they won’t quickly overtake your space. Pruning is well-tolerated and actually encourages bushier growth. This means you can maintain your preferred size and also create cuttings for propagation.
Q: Do hoyas need feeding?
A: Hoyas are light feeders compared to many houseplants and can actually thrive with minimal fertilisation. However, regular feeding during the growing season (spring and summer) does encourage more vigorous growth and can improve flowering. A balanced liquid houseplant fertiliser diluted to half strength and applied monthly from April to September is generally sufficient.
During autumn and winter when growth naturally slows, reduce or stop feeding entirely, as the plant cannot effectively use nutrients during dormancy. Excess fertiliser can also build up in the compost, potentially burning roots.
If you’re trying to encourage flowering, you might switch to a high-phosphorus fertiliser (such as tomato feed) during late spring and summer, as phosphorus supports bloom development.
Signs of over-feeding include brown, crispy leaf tips, white crusty deposits on the compost surface or pot rim (salt build-up), or excessively lush, weak growth that’s prone to pest problems. If you notice these signs, flush the compost thoroughly with plain water and reduce feeding frequency. Hoyas grown in fresh compost generally don’t need any fertiliser for the first few months, as the compost contains adequate nutrients.
Q: How often should I repot my hoya?
A: Hoyas don’t need frequent repotting and generally prefer being slightly pot-bound. They often flower better when their roots are snug in their container. Most hoyas only need repotting every 2-3 years, and some can happily remain in the same pot for even longer.
Signs that repotting is needed include:
- Roots growing extensively out of drainage holes.
- Water running straight through the pot without being absorbed (indicating the compost has broken down).
- The plant drying out extremely quickly after watering.
- Very slow growth despite good care.
When you do repot, choose a pot only one size larger than the current one. The best time to repot is in spring just as new growth begins, when the plant can quickly establish into fresh compost. After repotting, water lightly and avoid fertilising for the first month whilst the plant settles. Don’t be alarmed if growth slows or the plant looks slightly stressed initially. This is normal and it should recover within a few weeks.
If your hoya is very large and repotting is impractical, you can refresh just the top few centimetres of compost annually instead, carefully removing old compost and replacing it with fresh mix.
Final thoughts
With their stunning flowers, sculptural foliage, and remarkable longevity, it’s easy to see why hoya are so popular. Once you understand their preference for bright light, infrequent watering, and well-draining compost, hoya care also becomes straightforward. The key is to resist the urge to fuss over them. Hoyas appreciate a bit of benign neglect and often thrive when left to their own devices between waterings.
Don’t be discouraged if your hoya seems slow to get going or refuses to flower in its first few years. This is completely normal, and patience is genuinely the most important care requirement. Focus on consistency and your hoya will reward you when it’s ready.