
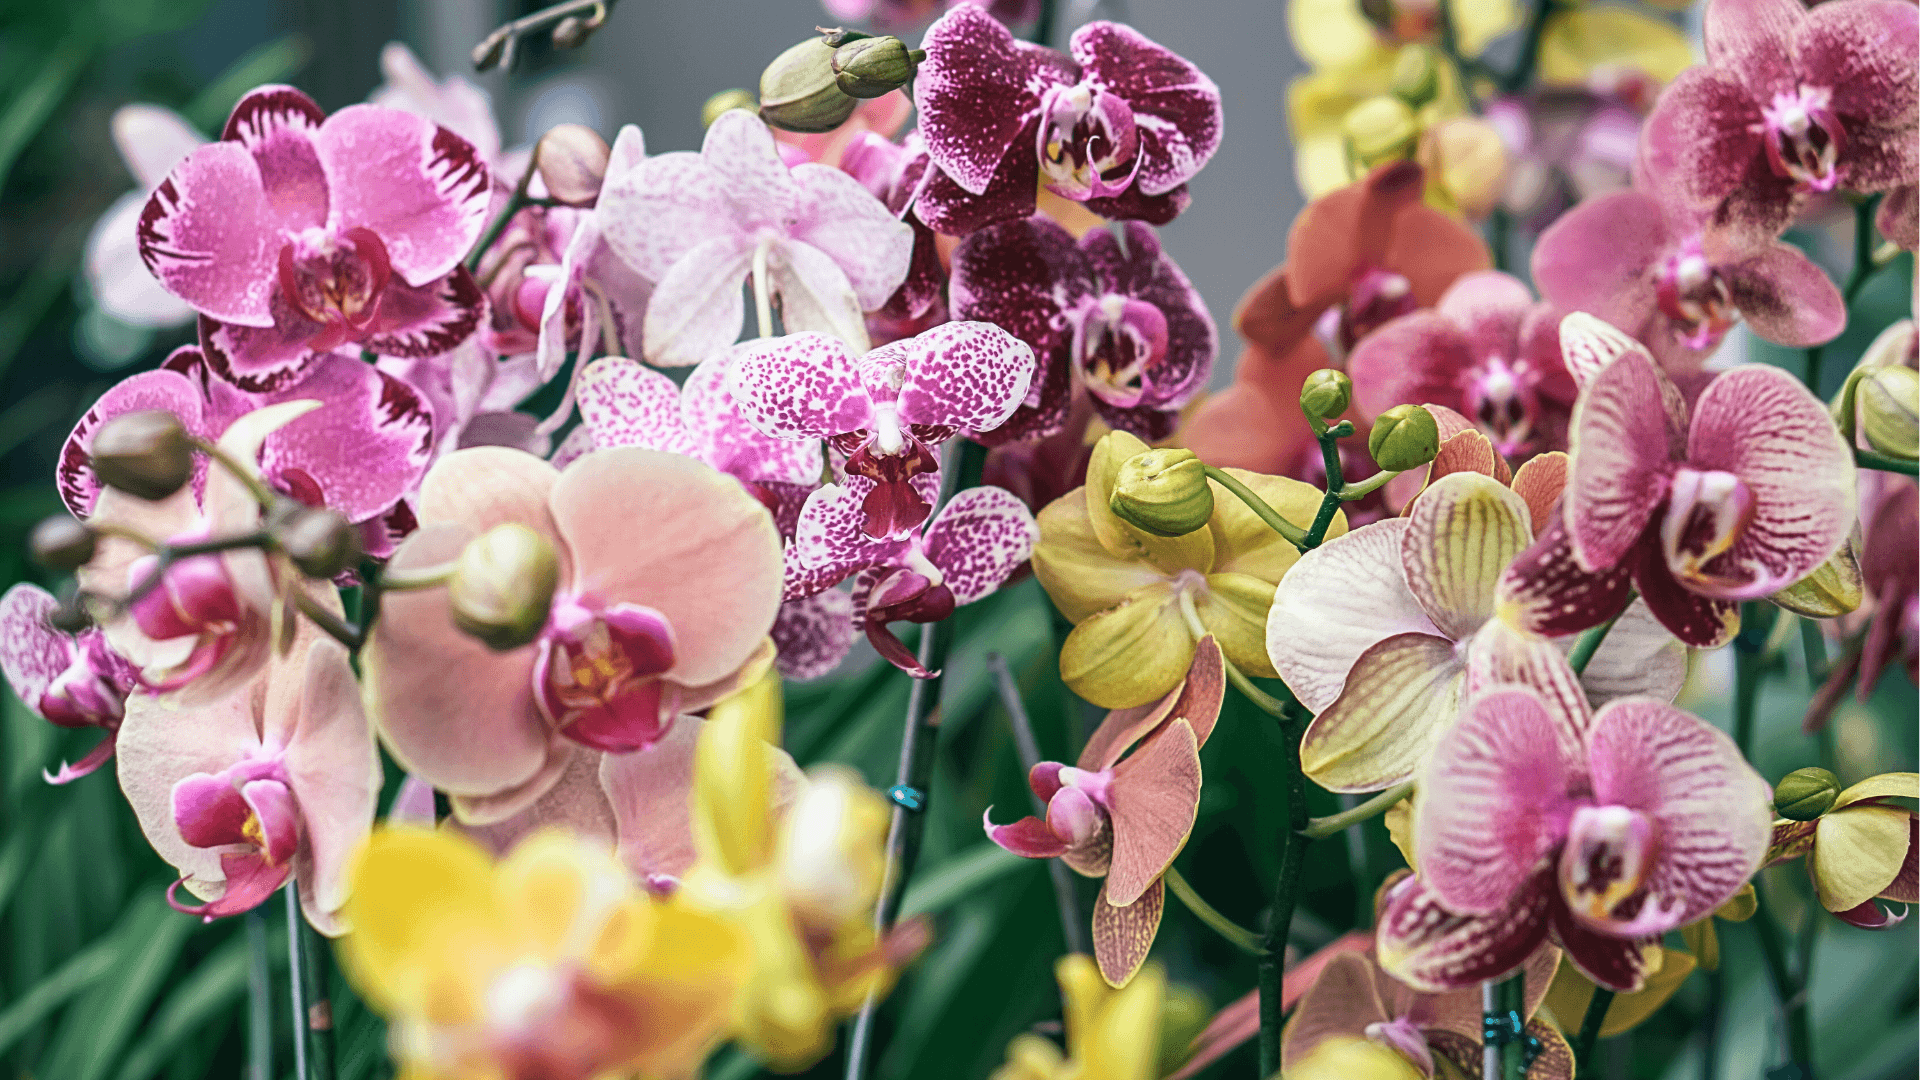
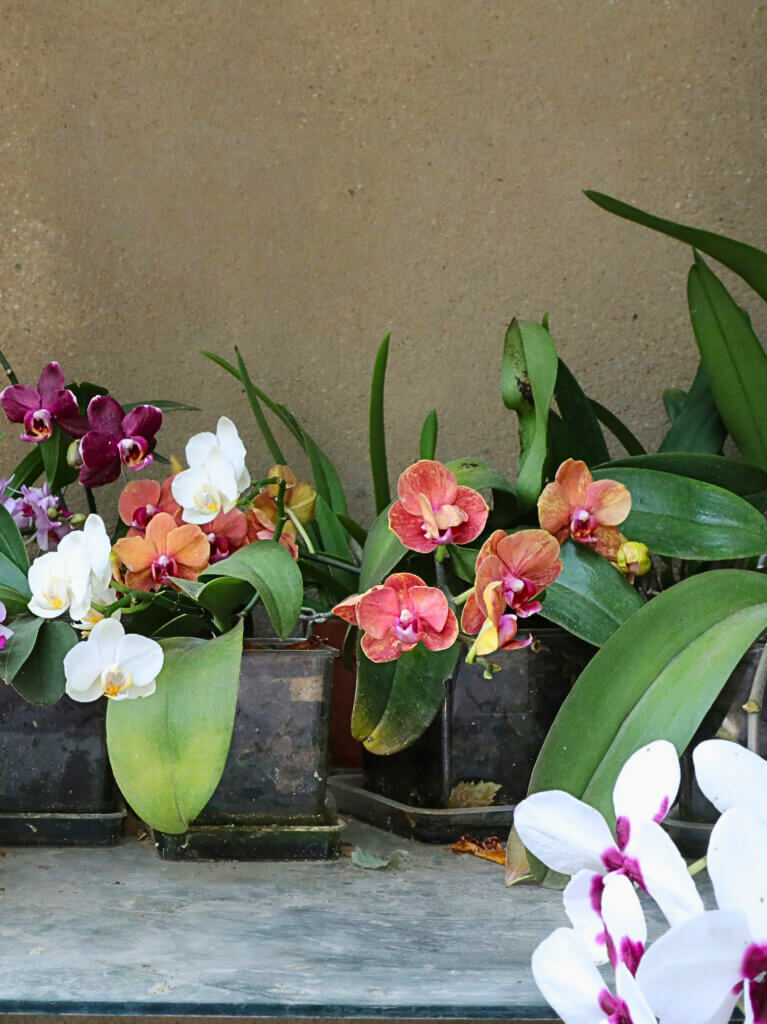
Orchids are some of the most beautiful houseplants you can grow. They’re perfect for bringing elegance to any home, or for giving as an unusual gift. It’s unfortunate then that people can often feel anxious about trying to grow them. Their exotic blooms, which can last for months, often lead people to assume they need specialist knowledge or greenhouse conditions. In reality, proper orchid care is fairly straightforward. With a basic understanding of what orchids need, you can easily build your own collection of healthy, thriving orchids.
The most commonly available orchid, the Phalaenopsis or moth orchid, is actually very forgiving and well-suited to the average home environment. Proper orchid care don’t require constant attention or complicated routines, but they do need slightly different care from traditional houseplants. In their natural habitat, most orchids grow attached to trees in tropical forests, their roots exposed to air and dappled sunlight rather than buried in soil. Understanding this difference is the key to success.
This guide will cover the essentials of light and watering, demystify the specialist growing medium orchids need, and help you troubleshoot common problems. Read on to learn everything you need to know to keep your orchid healthy, blooming, and thriving for years to come.
In this guide
Quick orchid care guide
| ☀️ Light | Bright, indirect light |
| 💧 Water | Weekly in summer, fortnightly in winter |
| ♨️ Humidity | Average |
| 🪴 Compost | Orchid bark mix |
| 🌺 Flowering | Late winter – spring |
Best location for your orchid
Finding the right spot is essential to successful orchid care. Most popular orchids, particularly Phalaenopsis (moth orchids), thrive in bright, indirect light rather than direct sunlight. East-facing windowsills are ideal, offering gentle morning sun without the harsh afternoon rays. South-facing windows can work well too, but you may need to filter the light with a sheer curtain, especially during summer months. Avoid placing your orchid in dark corners or north-facing windows where light levels are too low. The key is to observe your plant’s response and adjust accordingly. Remember that light requirements vary slightly between orchid varieties, so it’s worth researching your specific type.
Signs your orchid is getting too much light
- Leaves turning yellowish or bleached in appearance
- Brown, scorched patches or tips on the foliage
- Leaves feeling hot to the touch during the day
- Rapid drying out of the growing medium
- Leaves appearing papery or thin
Signs your orchid is getting too little light
- Dark green, floppy leaves instead of firm, lighter green ones
- Failure to produce flower spikes or buds
- Slow or stunted growth
- Leaves stretching or leaning towards the light source
- Previously flowering plants refusing to rebloom
How to display your orchid
Orchids make stunning focal points in any room. Display them at eye level where their elegant blooms can be fully appreciated. Group several orchids together for dramatic impact, mixing different colours and varieties. Avoid placing orchids near ripening fruit, which releases ethylene gas that can cause premature flower drop, or near heating vents and radiators where the air is too dry and temperatures fluctuate.

How often to water your orchid
Watering is perhaps the most critical aspect of orchid care, and overwatering is the most common cause of orchid death. Unlike many houseplants, orchids prefer to dry out slightly between waterings. The frequency depends on various factors including temperature, humidity, pot size, and growing medium.
Most orchids are epiphytes in nature, clinging to trees with their roots exposed to air, so they’re adapted to periods of moisture followed by drying. A good test is to stick your finger into the potting medium; if it feels dry an inch below the surface, it’s time to water. When you do water, do it thoroughly, allowing water to run through the pot completely, then ensure all excess drains away.
Never let your orchid sit in standing water, as this leads to root rot.
A rough watering schedule should be:
- Spring: once every 5-7 days as growth accelerates
- Summer: once every 4-6 days during warm weather
- Autumn: once every 7-10 days as temperatures cool
- Winter: once every 10-14 days when growth slows
When to increase watering:
- During active growth periods when new leaves or roots are forming
- When flower spikes are developing and blooming
- In warm weather or when dry air (often caused by indoor heating)
- If the potting medium is particularly bark-based and free-draining
- When roots appear silvery-grey rather than green (indicating dryness)
When to reduce watering:
- When growth slows, usually in the Autumn.
- When the weather starts to cool, leading to less evaporation.
- If your plant is in a space with high humidity, like a bathroom with poor ventilation.
- If your plant is showing signs of overwatering, such as yellowing or dropping leaves.
When to water most infrequently:
- During the dormant period after flowering has finished
- In cooler winter months when evaporation is slower
- If you notice roots turning brown or mushy
- When growing in a less porous medium like sphagnum moss
- If leaves appear swollen or develop dark spots (signs of overwatering)
Top Tip
You may see some sources recommending adding ice cubes to your orchid pots as a way of maintaining consistent moisture. Although there is some debate over this, in general tropical plant experts tend to recommend against it. In the wild, orchids are accustomed to warm tropical rain, so using ice cubes or very cold water can damage the roots. Watering with ice cubes is also unlikely to give your plant enough moisture. For best results, water your orchids as described above with room temperature water.
Best compost for orchids
Proper orchid care requires a completely different growing medium from traditional houseplants. Standard potting compost retains far too much moisture and will quickly suffocate orchid roots. In their natural habitat, most orchids grow attached to trees with their roots exposed to air, so they need a medium that mimics these conditions: excellent drainage, good air circulation, and the ability to dry out between waterings.
The best option for most orchids, particularly Phalaenopsis, is a specialist orchid bark mix, which you can find at most garden centres. This typically consists of chunky pine or fir bark pieces, often blended with perlite, charcoal, and sometimes sphagnum moss. The bark pieces create air pockets around the roots, allowing them to breathe whilst providing stability and retaining just enough moisture. Fine-grade bark suits smaller orchids and young plants, whilst medium to coarse grades work better for mature specimens.
Sphagnum moss is another excellent choice, especially for mounting orchids or growing Phalaenopsis. It holds moisture well whilst remaining airy, but requires careful monitoring as it can stay wet longer than bark. It’s particularly useful in dry environments or for orchids that prefer slightly more consistent moisture.
Whatever medium you choose, remember that it will break down over time. Bark typically degrades within 18-24 months, becoming compacted and water-retentive. Be sure to repot your orchid every couple of years as your growing medium will get progressively worse at providing adequate drainage and aeration.
Common orchid problems
Here are some of the common problems your orchid may encounter, and how to fix them.
Bud blast
Bud blast is the frustrating problem where developing flower buds turn yellow and drop off before opening. The most common causes are environmental stress, particularly sudden changes in temperature, draughts from windows or doors, or placing the orchid near radiators. Low humidity can also trigger bud blast, as can overwatering or underwatering during the budding phase. Even something as simple as moving the orchid to a different location can stress it enough to cause bud drop.
Prevention is easier than cure with bud blast. Once a bud has started to yellow and wither, it sadly can’t be saved. However, you can protect remaining buds by immediately stabilising the plant’s environment. Avoid moving the orchid once buds have formed, keep it away from draughts and heat sources, and maintain consistent watering. Increase humidity around the plant by placing it on a pebble tray filled with water (ensuring the pot doesn’t sit in the water) or using a room humidifier. Keep temperatures stable, ideally between 18-24°C during the day. Don’t be tempted to overfeed during budding, as this can also cause problems.
Lack of flowers
Many orchid owners find their plant bloomed beautifully when purchased but refuses to flower again, despite appearing healthy with good foliage growth. This is one of the most common frustrations and is usually down to insufficient light or lack of a proper temperature drop. Phalaenopsis orchids, in particular, need a period of cooler night-time temperatures (around 15-18°C) to trigger spike formation. Without this difference between day and night temperatures, the plant simply won’t start flowering.
To encourage reblooming, first ensure your orchid is getting enough bright, indirect light. In autumn, give your orchid a temperature shock by placing it in a cooler room or near a window (avoiding cold draughts). This cooling period should last 4-6 weeks. Continue regular watering and feeding throughout this time. Once you see a flower spike emerging, move the plant back to its regular spot and maintain consistent conditions. Feed with a bloom-promoting fertiliser (higher in phosphorus) every other watering.
Root rot
Root rot is one of the most serious problems orchids face and is almost always caused by overwatering or poor drainage. Healthy orchid roots should be plump, firm, and either bright green when wet or silvery-grey when dry. Rotted roots turn brown or black, become mushy, and may have an unpleasant smell.
Immediate action is required to save an orchid with root rot. Remove the plant from its pot and carefully wash away all the old growing medium. Using sterilised scissors or pruning shears, cut away all brown, mushy, or hollow roots, leaving only healthy, firm tissue. If any roots remain, repot the orchid in fresh, well-draining orchid bark in a pot with plenty of drainage holes. Water sparingly for the first few weeks whilst the plant recovers, allowing the medium to dry out between waterings. If no healthy roots remain, the orchid can sometimes be saved by placing it in a humid environment and misting until new roots develop.
Yellow Leaves
Yellow leaves on your orchid can indicate several issues, though occasional lower leaves turning yellow and dropping is perfectly normal as the plant ages. If multiple leaves are yellowing simultaneously, this usually points to overwatering. Yellowing can also mean too much direct sunlight bleaching the foliage, or occasionally from natural ageing after the plant has flowered. Nutrient deficiency, particularly nitrogen, can also cause yellowing across the plant.
First, check your watering routine and ensure the roots aren’t sitting in soggy compost or standing water. Check to see if the growing medium feels wet. If it is then reduce watering frequency and check the pot has adequate drainage holes. If the issue is light-related, move your orchid away from direct sun. Consider feeding with a balanced orchid fertiliser if you haven’t fed your plant recently, following the dilution instructions carefully.
Crown rot
Crown rot affects the central growing point of the orchid where new leaves emerge, and is caused by water sitting in the crown, particularly in cooler conditions. Monopodial orchids like Phalaenopsis are especially vulnerable. You’ll notice the centre of the plant turning brown or black and becoming soft and mushy. Leaves may yellow and detach easily from the crown. This often happens after watering from above or misting when the plant cannot dry quickly enough. Unfortunately, crown rot is often fatal, as it destroys the plant’s only growing point.
If caught very early, you may be able to save the orchid by carefully removing all affected tissue with a sterilised blade, cutting back to healthy, firm growth. Dust the wound with cinnamon powder (a natural fungicide) or sulphur powder and ensure it dries completely. Keep the plant in a warm, well-ventilated area and avoid getting water near the damaged area. Stop misting entirely. The plant may produce a basal keiki (baby plant) from the stem, which can eventually replace the mother plant, though this isn’t guaranteed.
Top Tip
Crown rot can usually be prevented in with proper orchid care. Always water in the morning so any water in the crown can evaporate during the day. If water does collect in the crown, dab it out with a tissue or cotton bud.
Wrinkled, Leathery Leaves
When orchid leaves lose their firmness and become wrinkled or leathery, it shows the plant is dehydrated. Whilst underwatering can be the cause of this, damaged or rotted roots are actually more common culprits, as they stop absorbing water properly. Other causes include very low humidity, heat stress, or damage to the root system from repotting or pests.
Check the roots first by carefully removing the plant from its pot to check if the roots are brown or mushy. If roots are healthy but dry, gradually increase watering frequency rather than suddenly drenching the plant, which can shock it. Improve humidity by grouping plants together, using a pebble tray, or running a humidifier nearby. Ensure the orchid isn’t in direct hot sun or near heat sources. Recovery can be slow but new leaves should grow in looking healthy.
No aerial roots
Whilst not always a problem, a complete lack of aerial roots on orchids that typically produce them (like Phalaenopsis) can indicate the plant isn’t entirely happy with its conditions. Aerial roots naturally grow above the potting medium, often extending out of drainage holes or over the pot rim. They help the plant absorb moisture from the air. If your orchid produces only roots within the pot or very few roots overall, it may suggest humidity is too low, the plant is stressed, or it’s focusing energy on recovery rather than growth. Very young orchids may also simply not have developed aerial roots yet.
Generally, this isn’t cause for concern if the plant is otherwise healthy, however, you can usually encourage aerial root development by increasing humidity using a humidifier, grouping plants together, or placing the orchid on a wide pebble tray with water. Never force aerial roots into the potting medium or try to bury them, as they serve different functions to potted roots. When they do appear, you can mist them occasionally, and they’ll gradually develop their characteristic silvery-green appearance.
Mealy bugs, aphids, and scale insects
These common sap feeders are drawn to Orchid plants. Sap feeders are often identifiable by the presence of a sticky substance called honeydew which may accumulate on the top of leaves, but each pest has its own quirks as well.
Mealy Bugs
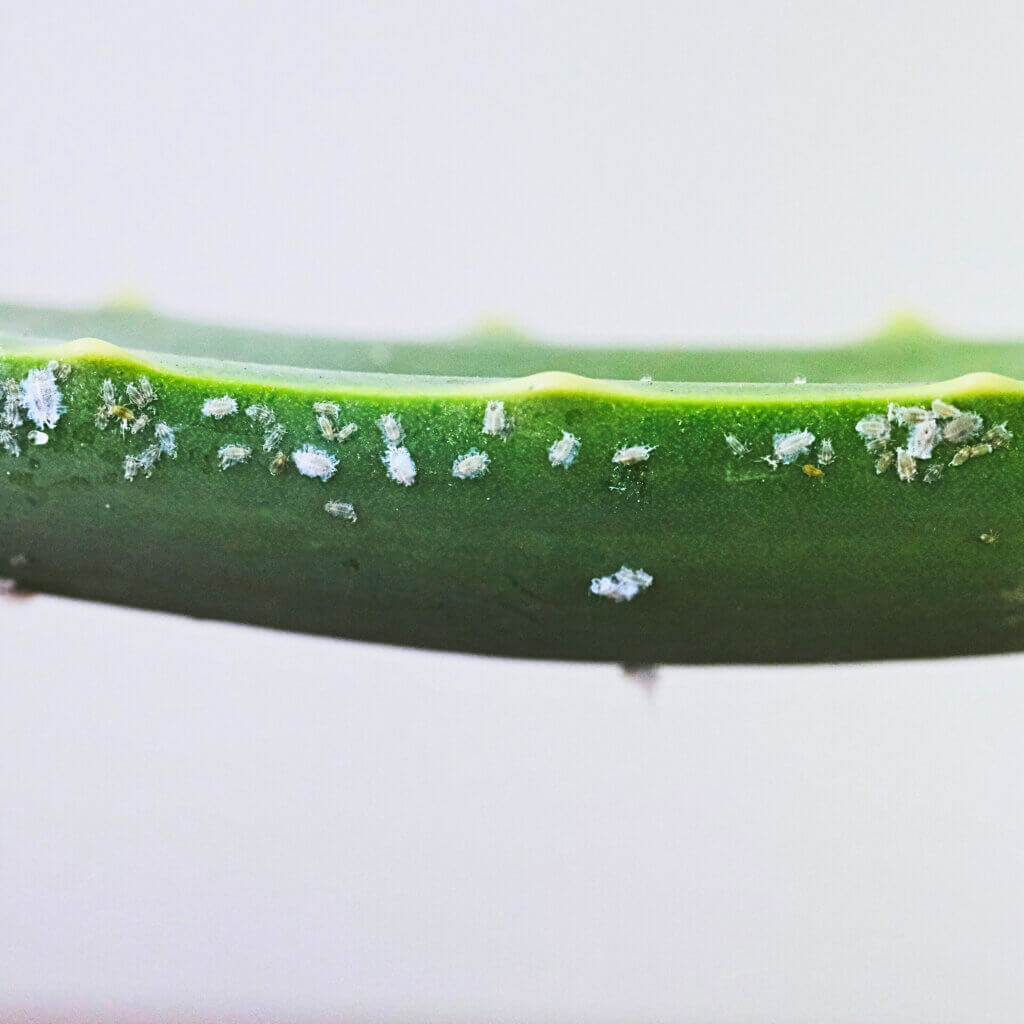
Mealy bugs often appear as a strange white fluff developing on your plant. These common household pest loves humidity so if you have them it might be good to move your plant somewhere drier.
Aphids
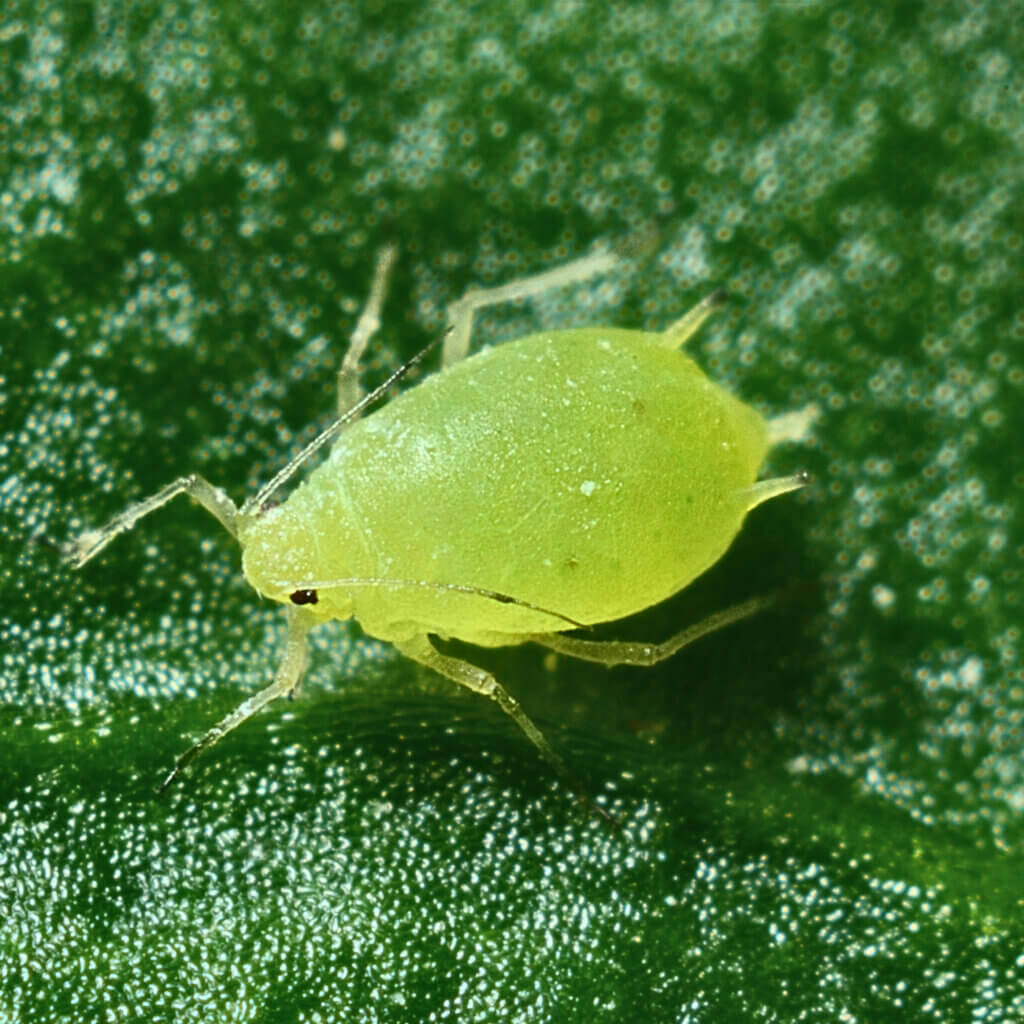
Aphids are usually pretty easy to spot, but you may be alerted to their presence by distorted and curling leaves, or by their white cast skins which can accumulate on leaves.
Scale Insects
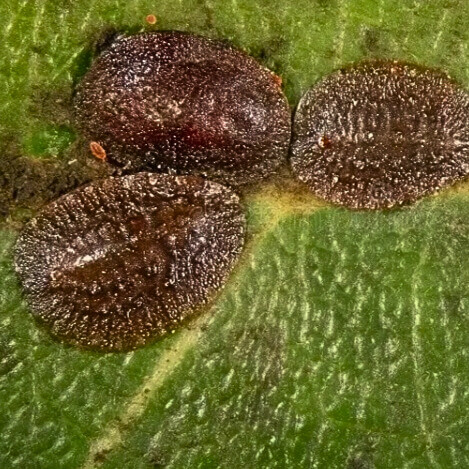
Scale insects can be spotted by looking for bumps on stems and leaves. These are the outer coverings of the insect. In summer you may also find egg clusters underneath leaves.
If dealt with promptly your plant should recover just fine. For a small population, manually removing them with a damp cloth is usually the easiest way. They are usually already on plants when they are purchased, so be sure to check stems carefully when bringing a new plant into your home.
How to propagate your orchid
Propagating orchids at home is more challenging than with many houseplants, but with patience and the right conditions it can be done. Unlike plants that readily root from stem cuttings, most orchids require specific methods depending on their type. The most common household orchid, Phalaenopsis (moth orchid), typically propagates through keikis (baby plants) that occasionally develop on flower spikes or at the base of the plant.
Propagating from keikis
Keikis are genetic clones of the parent plant that sometimes appear on Phalaenopsis orchids, usually along the flower spike after blooming has finished. A keiki will develop its own leaves and root system. You’ll know a keiki is ready to separate when it has at least three leaves of its own and roots that are 5-8cm long. This usually takes 6-12 months from when the keiki first appears.
When the keiki is ready for separation, use sterilised scissors or a sharp knife to cut it away from the parent plant, ensuring you include a small section of the spike tissue. Plant the keiki in a small pot with fine-grade orchid bark, keeping it in a warm, humid environment with moderate light. Mist regularly and water sparingly until new growth appears. It may take 2-3 years before a keiki reaches flowering size.
Division of sympodial orchids
Sympodial orchids, such as Cattleyas, Dendrobiums, and Oncidiums, grow horizontally along a rhizome and are best propagated through division. This method works when the plant has outgrown its pot and has at least six healthy pseudobulbs (the swollen stem structures that store water and nutrients). Division not only creates new plants but helps keep the parent plant healthy.
To divide a sympodial orchid, remove it from its pot and carefully wash away the old growing medium so you can see the rhizome clearly. Using a sterilised knife or pruning shears, cut through the rhizome between pseudobulbs. Each division should have at least three or four healthy pseudobulbs with good roots attached. Pot each division in fresh orchid bark, ensuring pseudobulbs sit at the same level they were previously. Water sparingly for the first few weeks whilst the plant recovers from the shock of division, then resume normal care. Divided orchids typically need a season to settle before blooming again.
Propagating from stem cuttings
Some Dendrobium orchids can be propagated from cane cuttings. This works best with older canes that have finished flowering and are beginning to yellow but aren’t completely dead. The cane contains dormant nodes that, under the right conditions, can produce new plantlets.
Cut the cane into sections approximately 10-15cm long, ensuring each section has at least two or three nodes (the bumpy rings around the cane where leaves once grew). Lay these cuttings horizontally on moist sphagnum moss in a shallow tray, pressing them gently into the moss so the nodes make contact but aren’t buried. Place the tray in a warm location with bright, indirect light and cover loosely with a clear plastic bag to maintain high humidity. Mist regularly to keep the moss damp but not waterlogged.
After several weeks to months, you should see small plantlets developing from the nodes, complete with their own roots. Once these plantlets have roots 2-3cm long and several leaves, they can be carefully separated and potted individually in fine orchid bark.
Top Tip
Warmth is crucial for propagation. Most orchids propagate best at temperatures between 21-27°C. High humidity encourages root development, however you need to still ensure some air circulation to prevent fungal problems.
Sterilise all tools before use as orchids are susceptible to viral and bacterial infections. Finally, avoid fertilising newly propagated orchids until they show signs of active growth, as their limited root systems cannot process nutrients effectively.
Orchid care FAQs
Q: Are orchids safe for pets?
A: Yes, orchids are generally safe for pets. Phalaenopsis orchids, the most common type sold as houseplants, are non-toxic to pets according to the ASPCA. However, whilst the orchid itself is safe, it’s worth noting that the growing medium (bark, moss) could present a choking hazard or pose risks if eaten in large quantities.
Looking for more pet safe plants?
Check out the complete guide to pet safe plants. Get advice on how to choose the right plants for your space and schedule, as well as creative ideas for how to style them.
Q: How long can orchids live?
A: With proper care, orchids can live for decades. In the wild, some orchid species have been documented living for over 50 years. The key to longevity is correct and consistent orchid, although orchids often become easier to care for as they mature because they develop stronger root systems and more resilient growth patterns. An orchid’s age doesn’t diminish its ability to flower, in fact mature plants often produce more impressive displays than younger specimens.
Q: How big can Orchids grow?
A: The size of orchids varies dramatically depending on the species. Phalaenopsis orchids, the most popular houseplant variety, typically remain compact with a spread of 20-30cm and height (including flower spike) of 60-90cm. However, the orchid family is very diverse. Some miniature orchids are barely 5cm tall, whilst certain Grammatophyllum species can grow into massive specimens with flower spikes reaching up to 3 metres in height. The plant itself grows slowly though, typically producing just one or two new leaves per year.
Q: Do orchids need feeding?
A: Yes, orchids benefit from regular feeding during their growing season, though they typically need less fertiliser than other houseplants. In the wild, orchids receive minimal nutrients from rainwater, decomposing bark, and bird droppings, so they’ve adapted to live on relatively little. A weak solution of specialist orchid fertiliser applied once a week during spring and summer is usually sufficient, with feeding reduced or stopped entirely during autumn and winter when growth slows.
Top Tip
A good way to remember your orchid fertiliser needs is “weekly and weakly”. Over-fertilising can damage roots and cause salt build-up in the growing medium, leading to burnt root tips and poor growth. Always water your orchid with plain water first, then apply diluted fertiliser to damp roots to prevent burning. If you notice white crusty deposits on the bark or pot rim, you’re over-fertilising. Rinse the medium thoroughly with plain water and reduce feeding frequency
Q: Why are the roots growing outside the pot?
A: Aerial roots growing outside the pot are completely normal and actually a sign of a healthy orchid. In nature, most orchids are epiphytes that grow attached to trees, with their roots exposed to air, rain, and dappled sunlight. These aerial roots are specially adapted to absorb moisture and nutrients from the air and rainfall. You should never trim healthy aerial roots as they contribute to the plant’s overall health. You also shouldn’t try to force them back into the pot or bury them in the growing medium, as they serve a different function to the roots inside the pot. Misting aerial roots occasionally will keep them plump and healthy.
Q: When should I repot my orchid?
A: Repot your orchid every 1-2 years. This is because the growing medium breaks down over time and becomes compacted, water-retentive, and less able to provide the drainage and aeration orchid roots require. The best time to repot is shortly after flowering has finished when the plant enters active growth, typically in spring.
When you do repot, choose a pot only slightly larger than the previous one (orchids actually prefer being slightly pot-bound), ensure it has plenty of drainage holes, and use fresh orchid bark. Soak the new bark in water for a few hours before use to remove dust and help it begin absorbing moisture. Remove all the old medium from the roots and trim any dead or rotted roots with sterilised scissors. Water sparingly for the first few weeks to allow damaged roots to heal and prevent rot, then resume normal watering once new root growth appears.
Final thoughts
Orchids have an undeserved reputation for being difficult, but the truth is that with a basic understanding of their needs, proper orchid care is fairly straightforward. The most important thing is to watch your plant and respond to what it’s telling you. Once you learn to read it’s signals, orchid care becomes intuitive rather than complicated. Orchids are actually remarkably resilient and can often recover from neglect or minor care errors if you catch the problem early and adjust your approach.
Don’t be discouraged if your orchid doesn’t rebloom immediately after its first display. These plants need some patience, but if you provide consistent conditions your orchid will reward you when it’s ready.
Finally, don’t let all the specialist information intimidate you. The basics in this guide are really all you need for common Phalaenopsis orchids. Start simple, and you may find yourself expanding your collection and exploring the wonderfully diverse world of orchid varieties.